GitHub integration
SmartGit integrates GitHub workflows in various places, provided that the connection to github.com or a custom GitHub Enterprise instance has been configured in the Preferences.
Setup
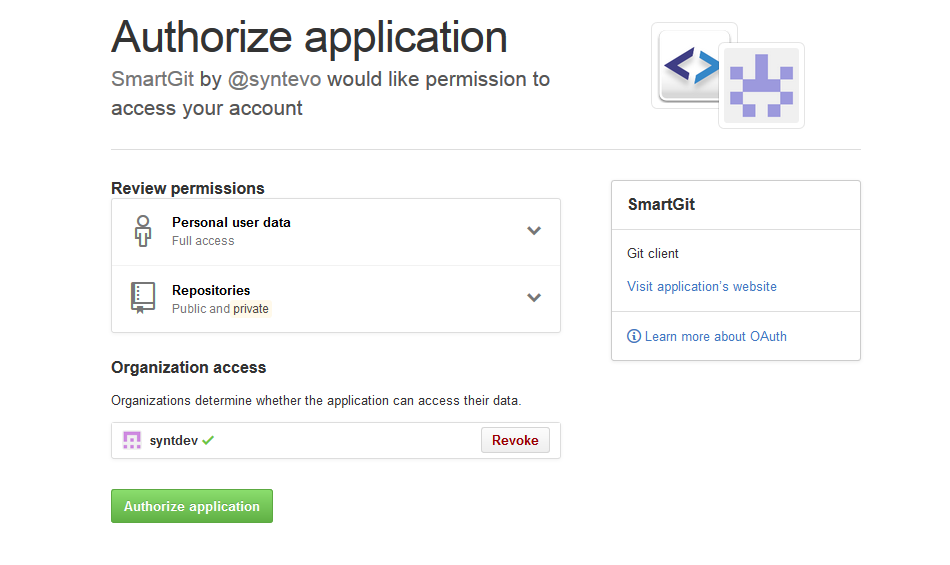
To set up the GitHub integration, go to Preferences, section Hosting Providers and use Add there. In the Add Hosting Provider dialog, have GitHub selected and invoke Generate API token. This should open up your default web browser where you will have to confirm by Authorize Application. Be sure to also Grant Access to all of your organizations, otherwise the corresponding organization repositories won’t show up/can’t be accessed.

Once you have confirmed this page, you will be redirected to syntevo.com, where the generated access code will be displayed. Copy&paste this code into SmartGit’s Generate API Token dialog and invoke Authenticate. The code will be used to create an application access token which will be used to populate the Token field. Finally, confirm the Add Hosting Provider dialog using Add.
Once you have authorized SmartGit, it will show up in your GitHub Settings, section Authorized Applications. If you need to rerun through the Authorization process outlined above, you have to Revoke access there first and start over.

Clone
When cloning a repository, you can select your repository from a list, instead of entering the URL. SmartGit will display your own (user) repositories, as well as repositories of your organization (org).
Main Window
The main window contains a light-weight GitHub integration which gives you an overview of incoming Pull Requests in the Branches view.
Pull request operations are only available in the Log (see below).
Log
In the Log window of your repository, you can interact with GitHub in following ways.
Pull Requests
When initially loading the Log, SmartGit will also refresh information on related Pull Requests from the GitHub server:
- Incoming pull requests are those which other users are requesting to pull from their repositories. They are displayed in a separate category called Pull Requests in the Branches view.
- Outgoing pull requests are those which you have sent to other users/repositories, requesting them to pull your changes. They are display directly below the local (or if it does not exist), the remote branch in the Branches view.
Incoming pull requests, in first place, are just known on the server. To get the commits, which such a pull request includes, locally, use invoke Fetch Pull Request from the context menu of the pull request. This will fetch all commits from the foreign repository to a special branch in your local repository and will create an additional merge node between the base commit from which the pull request has been forked and the latest (foreign) pull request commit. When selecting this merge node in the Graph, you can see the entire changes which a multi-commit pull request includes and you can comment on these changes, if necessary. After commenting changes, it’s probably a good idea to Reject the pull request to signal the initiator of the pull request, that modifications are required before you are willing to pull his changes. If you are fine with a pull request, you may Merge it. This will request the GitHub server to merge the pull request and then SmartGit will pull the corresponding branch, so you will have the merged changes locally available.
Outgoing pull requests can be Fetched as well, however this is usually not necessary, as the pull request belongs to you and it contains your own commits. If you decide that you want to take a pull request back, use Retract.
For a pull request which had been fetched once, there was a special ref created which will make it show up in the Pull Requests category, even if it is not present on the server anymore. In this case, you may use Drop Local Data on such a pull request to get rid of the corresponding ref, the local merge commit, all other commits of the pull request and the entry in Pull Requests as well. It’s safe to use Drop Local Data, as it will only affect the local repository and you can re-fetch a pull request anytime you like using Fetch again.
You can invoke Review|Sync to manually update the displayed information. Usually you will want to do that, if you know that server-side information has changed since the Log has been opened.
To create a pull request, use Create Pull Request from the context menu of the Branches view.
Comments
GitHub allows to comment on a commit itself or individual line changes (diffs). Comments can be applied to a commit or to a Pull Request. Comments will be refreshed together with pull requests after opening a Log or when manually invoking Review|Sync.
Commit comments will show up in the Graph view. Comments on individual lines will show up in the Changes view and the affected files will be highlighted in the Files and Graph view, too. This works the same way for line-comments of Pull Requests, provided that the pull request has been Fetched and the local pull request merge commit has been selected.
Comments can be created, modified and removed using the corresponding actions from the Comments menu or context menu actions in the Graph and Changes view. If a pull request merge commit is selected, only line-comments of the pull request can be manipulated.
Some behavior of the GitHub integration can be customized by system properties .
Possible Problems & Solutions
Authenticating with two or more accounts
If you want to authenticate to your GitHub repositories, using two or more accounts, open Preferences, section Hosting Providers, open the GitHub hosting provider there and deselect Use OAuth token for repository authentication. When pulling/pushing a GitHub repository for the next time, SmartGit will ask you for Username and Password. For the Username, just enter the appropriate GitHub account name, for the Password it’s recommended to generate a new Personal Access Token in your GitHub account settings.
Depending on your Git configuration, Git might request credentials only per-domain instead of per-repository. If so, try to reconfigure:
git config --global credential.useHttpPath true
Or even more selectively:
git config --global credential.github.com.useHttpPath true
Private repositories do not show up
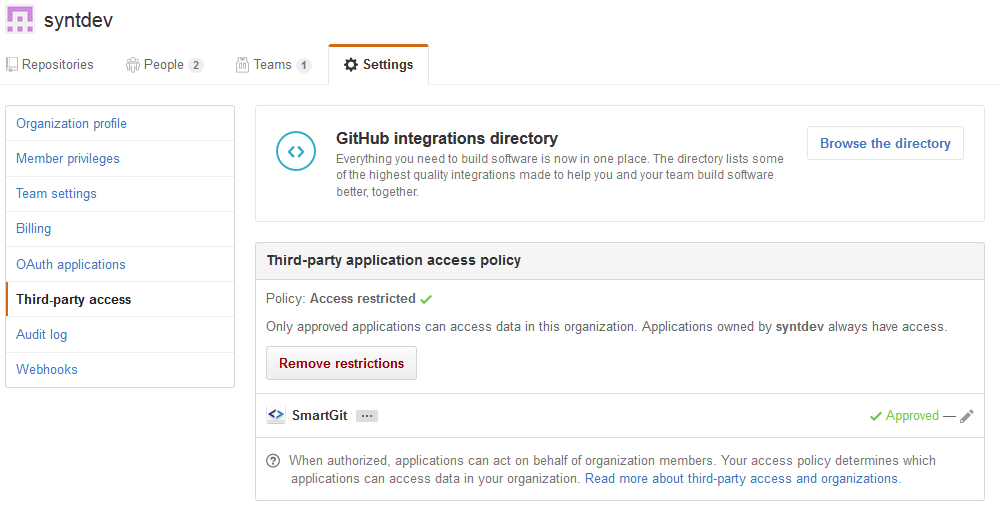
If you are authenticating using OAuth and you can’t see private repositories of your GitHub organization or pushing to your organization’s repositories fails with HTTP error code 403, make sure that your organization allows Third-party access and SmartGit is Approved. Your organization settings might look like this:

If your GitHub hosting provider is already set up in the Preferences and you need to rerun through the OAuth setup, then:
- Get rid of all GitHub-related credentials from Preferences, section Authentication
- Get rid of the GitHub hosting provider from Preferences, section Hosting Providers
- Rerun through the OAuth setup
