
SmartGit as SVN Bridge
This page provides an introduction to SmartGit from an SVN users perspective and shows how the most common SVN workflows can be performed using SmartGit.
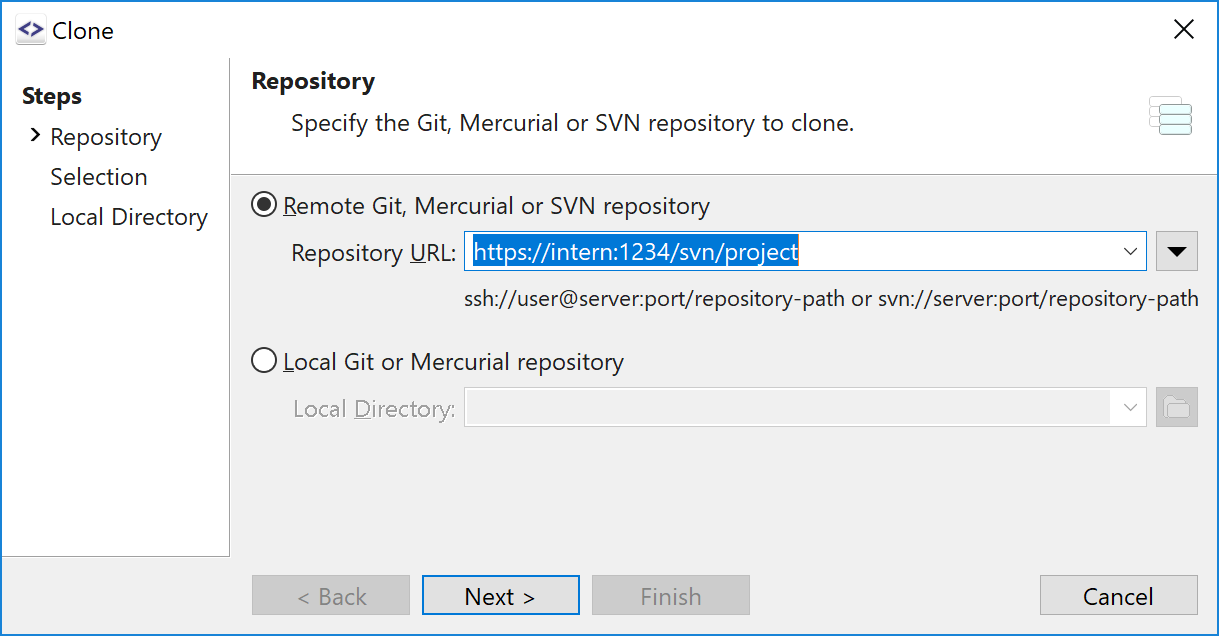
Check Out: cloning an SVN repository
With Git, you do not check out a certain revision, but you clone an
entire “repository”. For SVN repositories, you will get the complete
version history for the specific URL of your project (either a complete
Subversion repository or a sub-directory of such a repository which
contains your project, including trunk-, branches- and
tags-directory).
This may sound like a huge amount of data, but the initial phase of a
SmartGit clone is as quick as an svn checkout. Git is efficient in
storing version history: it’s not unusual that a Subversion working copy
(one single revision) and the complete Git clone (of all revisions) are
about the same size.
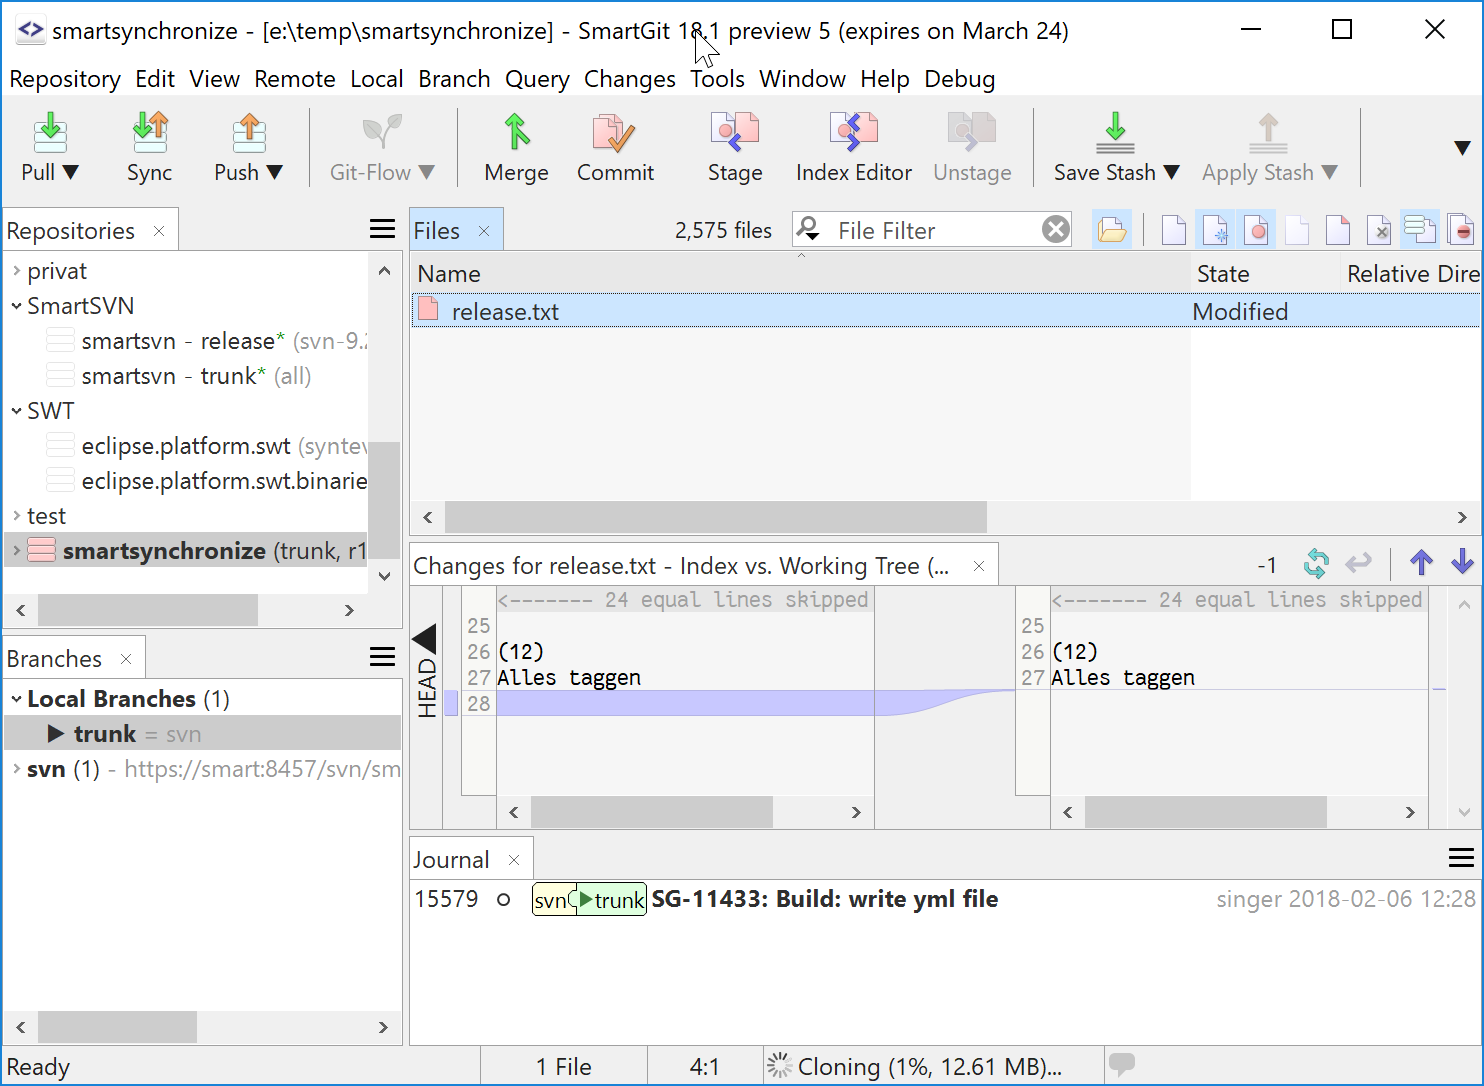
Working Copy: the Git working tree
Once the initial phase of Check Out has completed, SmartGit will open
your fully-functional Git repository in the project window. The Git
repository consists of a working tree and the entire version history
(stored in the .git-subdirectory) of your repository.
Similar to SVN, SmartGit provides several commands to alter your working tree. Most of them are located in the Local- and Branch-menu. Read more …
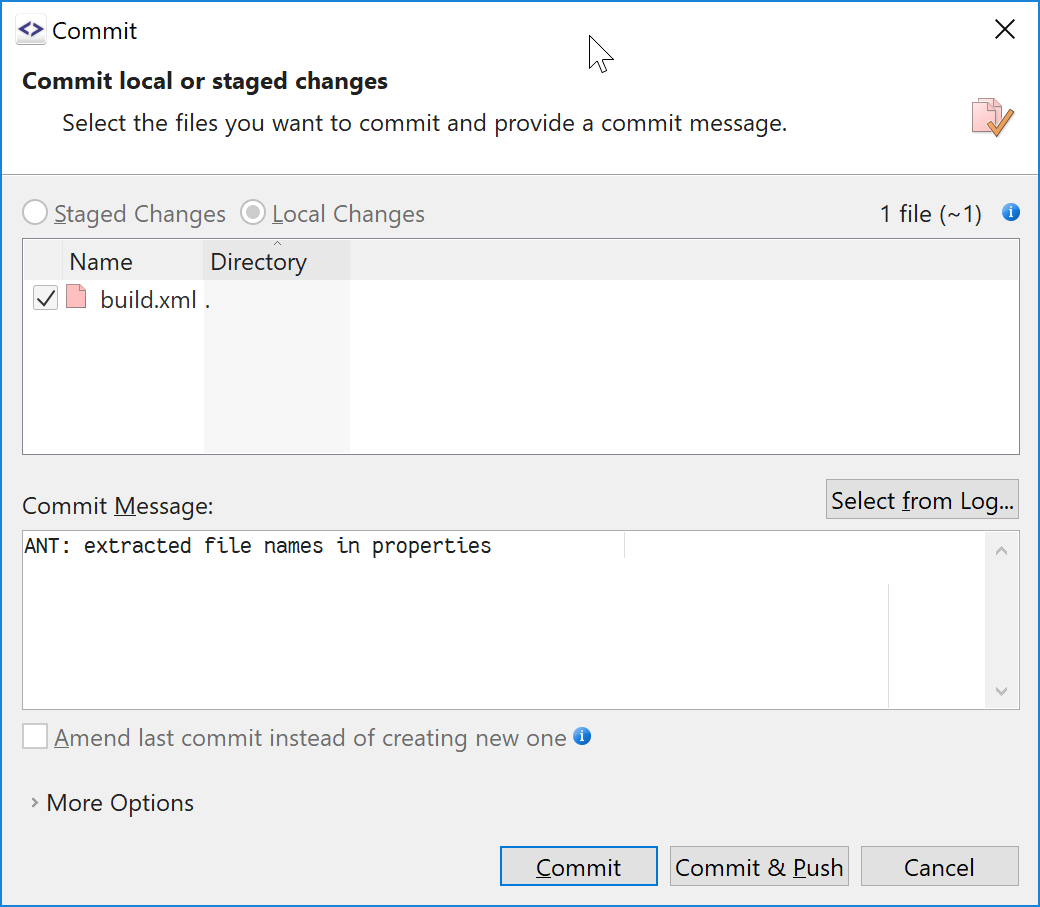
Commit (part 1): Commit locally
To commit your changes, use Local|Commit. This is a purely local operation and will create a Git commit in your (local) repository. It does not yet create any new revision in the SVN repository, nor does it contact the SVN server at all.
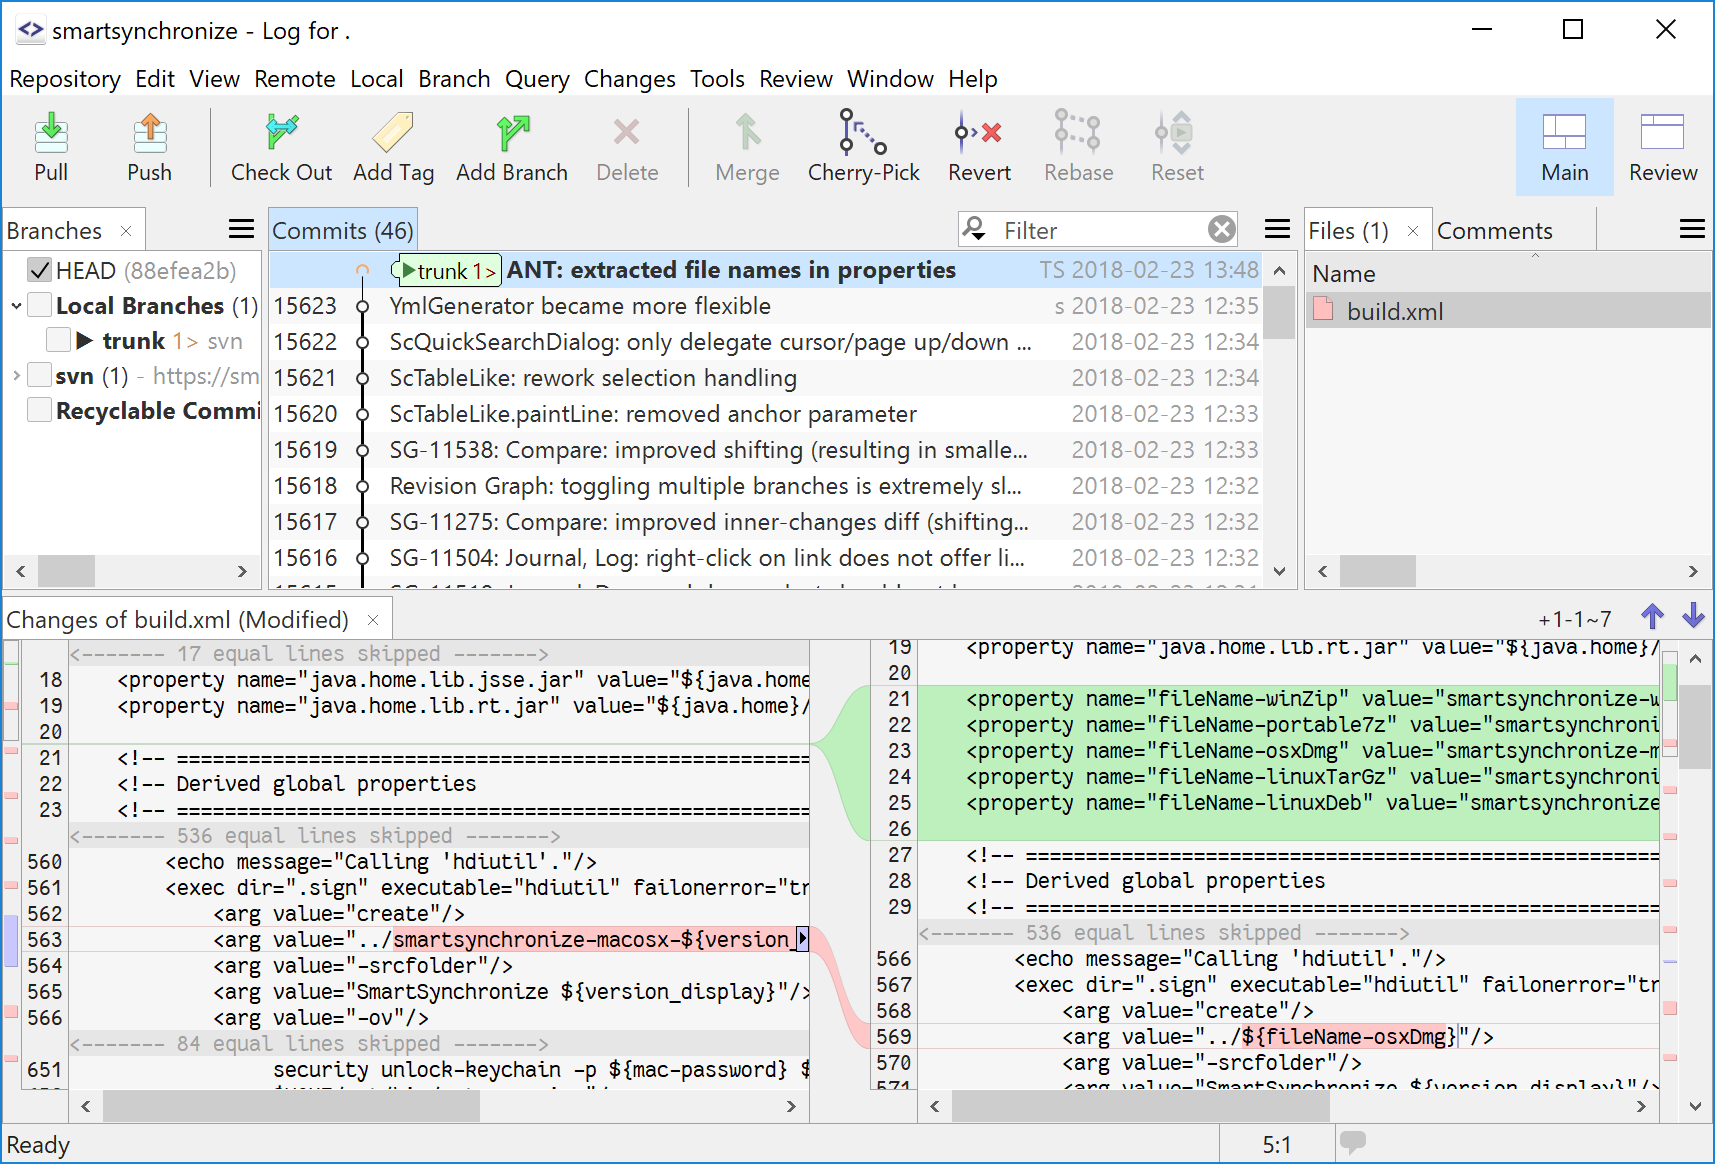
Log: Git commits and version history
The Log window shows the commits of your local Git repository:
commits which are ancestors of remote branches, like svn/trunk, are
already present in the SVN repository. Commits which are just ancestors
of local branches, like trunk, are only present in your local Git
repository.
The Log will only be present, once the Check Out has been finished and all revisions have been fetched.
Commit (part 2): Push
To publish your changes, as svn commit does immediately, you have to
Push your local commits back to the SVN repository by using
Remote|Push (Project window).
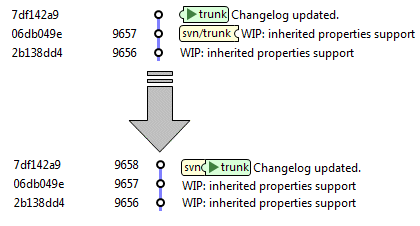
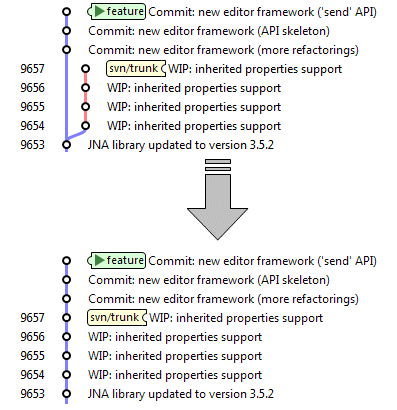
The results of a Push show up in the Log window: remote branches become updated to the corresponding local branches because the commits are now present in the SVN repository.
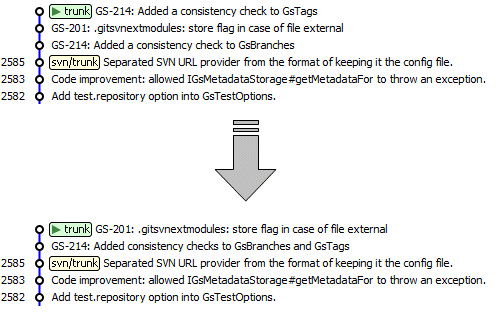
Until you have pushed your commits, you have all freedom to rearrange them:
Update: Pulling changes
To fetch the latest revisions of other users to your local Git repository, use Remote|Pull (Project window).
If you have local commits, you may either Pull (and hence Rebase) your changes onto the latest SVN commits, or you may just Fetch these commits and have your local branch diverge from the remote branch. In the latter case, you need to Rebase your local commits onto the latest SVN commits manually.
Switch: changing the current branch
Contrary to SVN, branches and tags are native concepts of Git. Read more …
SmartGit maps branches/ and tags/ directory of your SVN repository
to Git branches and tags accordingly. Read more …
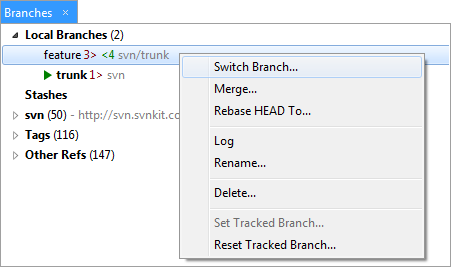
To switch (svn switch) from one branch to another, you may use
Local|Check Out or the Switch menu item from the popup menu in
the Branches view (Project window).
Merge (part 1): Merging release branches
Release branches are merged from time to time to the main development
line (usually trunk). In SmartGit, use Branch|Merge to perform
such a merge (Project and Log window). This will result in a merge
commit which is a core concept of Git. When pushing, it will be
translated back to the SVN svn:mergeinfo property.
Merge (part 2): Rebasing feature branches
When using SVN, maintaining features branches requires merging from the main development line from time to time and finally performing a reintegrating merge to get the feature back into the main development line. With Git there is a more effective mechanism for that, called “Rebase”: Rebase will rewrite your feature branch commits onto the latest commits of your main code base.
Rebase can be used for locally as well as for remotely managed feature branches. It will also be used to rewrite your local commits onto the latest SVN commits when Pulling.
Copy (WC-URL, URL-URL): creating tags and branches
You can create a new branch or tag simply by using Branch|Add
Branch or Branch|Add Tag on a specific commit (Log window). For
example, branch feature and tag milestone-1. Read more …

As for commits, both, branches and tags, are just locally present in
your Git repository after adding them. To create the branch in the SVN
repository as well, use Remote|Push (project window) for the
current branch or Push from the Branches-view context menu
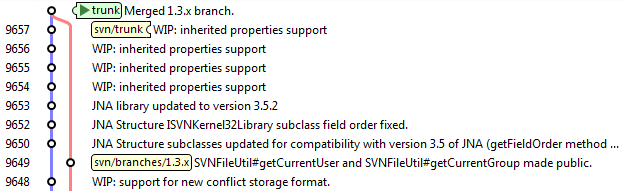
(Project window) for all other branches. This will result in a new SVN
revision, for which branches/feature will be added and marked as
copied from trunk. The corresponding Git branch svn/branches/feature
shows up in the Log window immediately after the Push:

Local tags do not have a remote counterpart in the Git repository.
They can simply be pushed to SVN, either immediately when creating them
(Add Tag dialog) or later from the Branches-view context menu
(Project window).